How to Reduce Azure VM Cost?
Are you frustrated with increasing Azure cloud costs? For most Azure workloads, the biggest factor affecting the cost is the Azure VM resource. However, it is possible to reduce VM cost by adopting a set of strategies in provisioning and using the VM resources. This article provides 10 tips you can use today to reduce your Azure VM cost.
Overview Azure VM Cost Reduction Tips
Here are the top 10 tips for reducing Azure VM cost,
- Select the Right VM Type for your Workload
- Select the Right VM Size for your Workload
- Use a Low Cost Region for your VMs
- Use Azure Spot Instance
- Use Azure Hybrid Benefit
- Use Reserved Azure VM Instance
- Reduce Cost by Using a Smaller VM Disk
- Use Auto Shutdown Feature for VM
- Use Azure Advisor to Monitor Cost Reduction Opportunities
- Analyse your VM Cost Breakdown for Optimising Cost
Details on each of the Azure VM cost reduction tips is given below,
1. Select the Right VM Type for your Workload
There are 3 key decisions you need to make before you decide to create an Azure VM. This includes the type of VM you need, the type of OS you want to run on the VM and the region where you want to run your VM. Note that the available options for VMs change based on your region and OS requirements. Use the Azure VM selector tool to narrow down your VM choice.
After specifying the OS and your hosting region requirement (if any), the most important thing to decide is the VM type based on your workload requirement. At a high level, VM types for the following common workload types are available,
- General-purpose workloads
- Compute-intensive workloads
- Storage-intensive workloads
- Memory-intensive workloads
- GPU-enabled workloads
- High-performance computing (HPC) workloads
Once the VM type is selected, you can fine tune the VM selection by using the following requirement filters,
- The CPU brand you need - AMD, Intel or Ampere Altra arm
- Type of CPU usage - continuous or burst usage
- Do you need a GPU in the VM?
- Do you need a storage or data disk attached?
According to this Microsoft blog, by using the newer Ampere Altra arm CPU, you can get up to 50% better price-performance for your cloud workloads!
Here is a sample VM type selection - A memory optimised VM instance in the West Europe region running CentOS 7.9 under AMD CPU with continuous usage and no data disk.
2. Select the Right VM Size for your Workload
After selecting the Azure VM type, the next major decision affecting the cost is the size of the VM. This is a combination of vCPU cores, memory, I/O speed and disk specifications. It is important to choose the lowest configuration that meets your workload requirements. This typically involves starting with a higher VM size, monitoring the key metrics of the provisioned VM and then optimising for the right VM size. Another approach will be to start with the smallest size and then upgrade as per workload requirement.
Here is a sample VM size selection - A memory optimised VM instance in the West Europe region running CentOS 7.9. Since the workload require at least 32GB, the initial VM model selected is E4bds_V5.
3. Use a Low Cost Region for your VMs
For most workloads, you will require a specific region for your VMs. However sometimes you may not need a specific region. In such cases, ensure that you provision your VM in a region which offers the lowest cost for your VM. For example, the East US region usually has 25% cheaper VM prices than the West Europe region. See this page for a region level price comparison of Azure VMs.
It is very important in this case to ensure that you are not doing any large scale data transfers between your VM in a separate region and your other resources in another region as it will lead to bandwidth cost and slow performance. Also please be aware of compliance and legal requirements when it comes to hosting your VM workloads in a specific region.
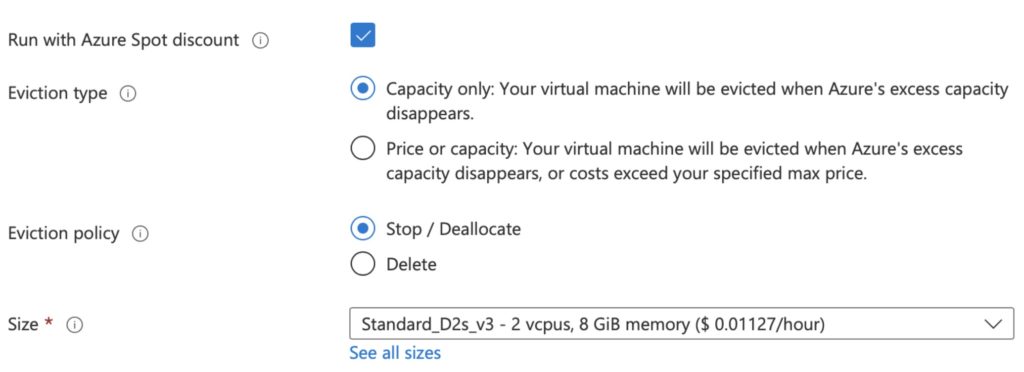
4. Use Azure Spot Instance
When you provision a VM, you have an option to specify it as a Spot VM. Spot VMs are up to 85% cheaper than usual VM instances since Azure uses its free available data centre capacity to power them. However, the catch is that your VM can be shutdown abruptly if Azure runs out of free VM instance pool. Hence this is only useful if you want to run some of your workloads using random available instances.
Clearly spot instances are not useful for always on services such as database servers or web applications. However, it is a good choice if you want some kind of background processing that can take its own sweet time to complete.
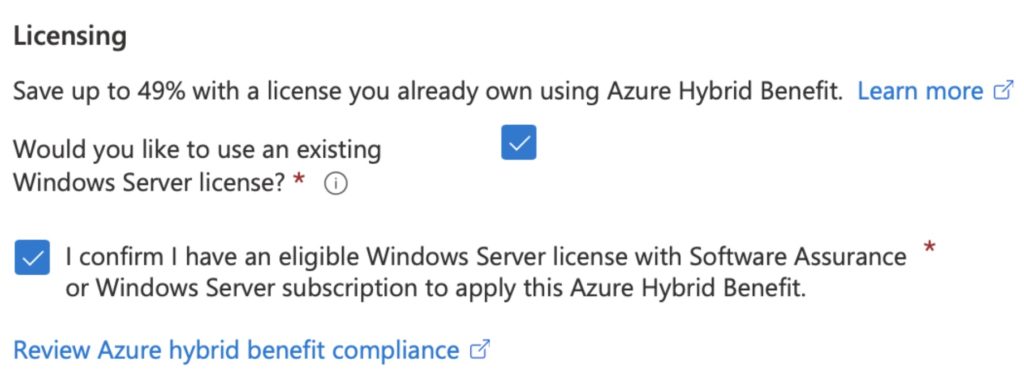
5. Use Azure Hybrid Benefit
If you are provisioning Windows server based VMs on Azure, you can save up to 49% by using your own Windows server licences. This hybrid benefit can be selected during the creation of Windows server VMs.
6. Use Reserved Azure VM Instance
Azure provides 4 different pricing options for virtual machines. These options ordered from high cost to low cost are pay as you go, 1 year reserved instances, 3 year reserved instances and spot instances. Please note that some options are available only to Azure customers in specific regions. For example, VM reservation for 1 year or 3 years is not available for Indian customers. Following are monthly prices for a sample VM for each option in the West Europe region (since prices also depend on the region). VM Type selected is Standard D4s V3 - 4vCPU and 16GB,
- Pay as you go option - $175
- 1 year VM reservation - $152 (13% discount)
- 3 years VM reservation - $120 (31% discount)
- Azure spot instance - $26 (85% discount)
If you are using a large pool of VMs, it is better to use a mixed reservation approach - you can reserve some for 3 years, some for short term 1 year and keep some unreserved if you plan to do some optimisations to reduce VM instances. See this page for various Azure VM pricing options.
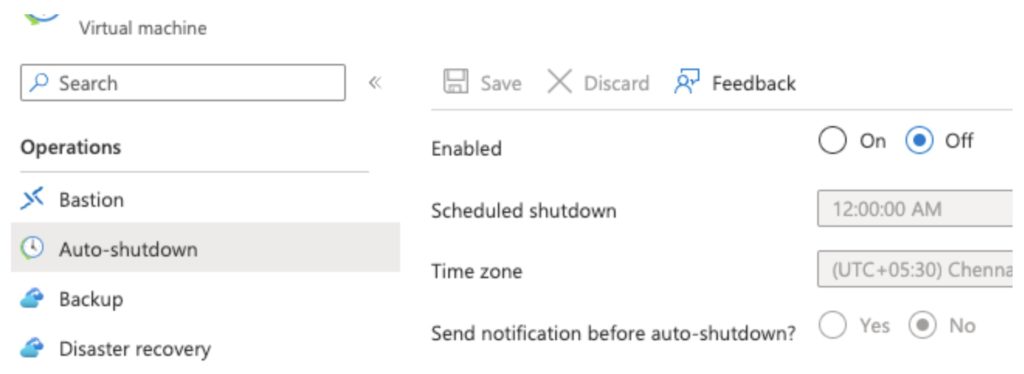
7. Use Auto Shutdown Feature for VM
Azure has a simple shutdown feature which can be configured to enable auto shutdown of a virtual machine at a specified time. This is quite useful for machines that are needed during work hours only. Even if you forget to switch off the VM after your work, the auto shutdown can kick in and turn off the machine. Auto shutdown feature is available for a VM under the Operations section on the left of the VM configuration page.
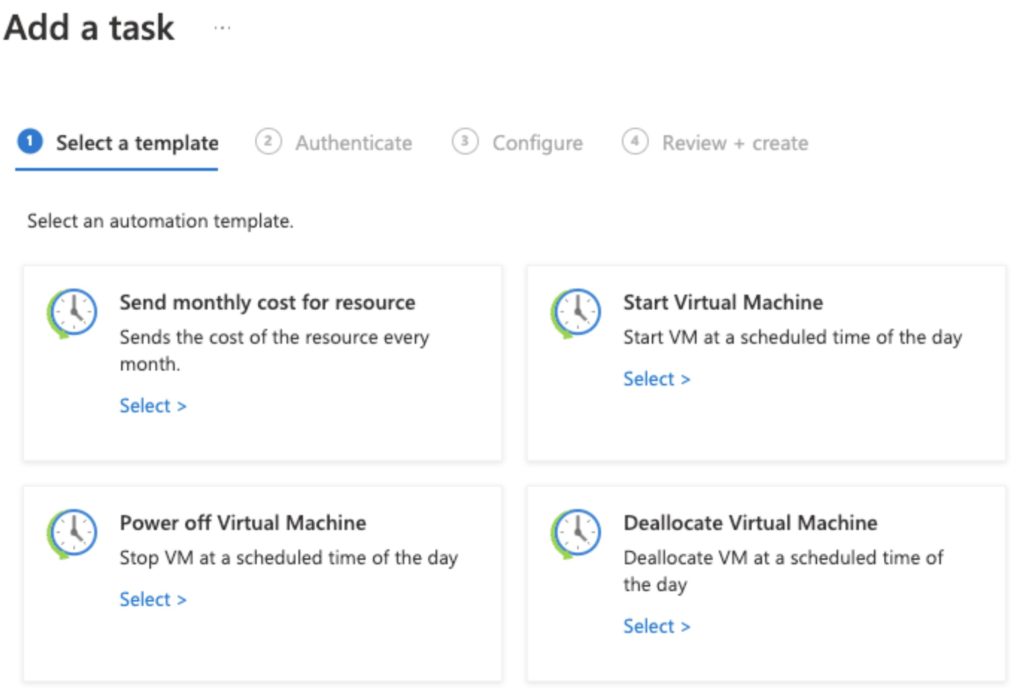
Sometimes you want your VM to be running for a specific time duration only. For example, you may need your machine running only between 9AM and 11AM. In such cases you can set up automation tasks for starting and stopping VMs. Use the Tasks link under the Automation section available on the left of the VM configuration page.
8. Reduce Cost by Using a Smaller VM OS Disk
When an Azure VM instance is created using the portal, you can only specify the type of disk (HDD or SSD) but not the size of the disk. Many OS images create disks of 128GB size and these also add to the cost of the VM. Hence one way to reduce the cost is to use a lower size OS disk. However, this option is not available on the portal, and hence you need to use PowerShell command or Azure CLI command to use a custom sized OS disk. Alternatively, you can create the VM from the portal and then reduce the OS disk size using the CLI.
9. Use Azure Advisor to Monitor Cost Reduction Opportunities
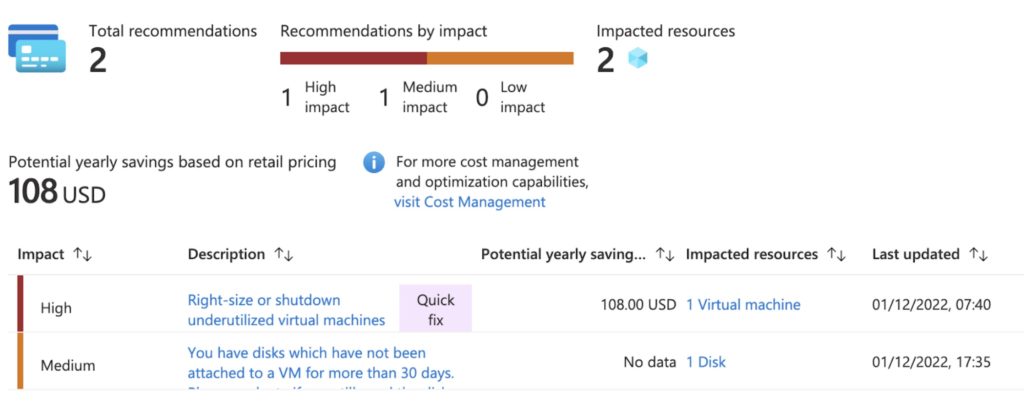
When you have a large number of resources under your Azure tenant, it is easy to miss cost optimisation options. In such cases, it is important to monitor cost reduction recommendations provided by Azure Advisor. Azure advisor has a separate section on cost recommendations and is capable of providing VM cost recommendations such as reservation options and reduction of VM size based on historic CPU usage. If you are part of a large organisation with a large set of Azure resources, it is important to have a weekly monitoring cost KPI driven by Azure cost Advisor.
10. Analyse your VM Cost Breakdown for Optimising Cost
An Azure VM provisioned usually has the following additional infrastructural components.
- OS Disk and Data disk attached to the VM
- Any public IP attached to the VM
- Networking traffic on VM network interface such as cost of network peering
Each of these components can incur additional cost over and above the VM cost. So it is recommended to analyse the cost incurred by these VM components in Azure portal periodically to further optimise VM cost.

