Hosting Static HTML Pages Using AWS Lambda and API Gateway
AWS Lambda and API Gateway are commonly used to create microservice JSON endpoints. In such applications, the static html content is usually stored in an S3 bucket. However if you are building a quick AWS lambda microservice prototype, it would be simpler to render static HTML from a lambda function. This has a number of advantages.
- We just need one Java project containing all lambda functions and the static content.
- We can host the microservice endpoints and static html on the same domain created by API gateway without any further configuration.
How to Host HTML Pages Using AWS Lambda and API Gateway
The following tutorial contains step by step instructions for hosting static html content using AWS lambda and API gateway. AWS lambda supports multiple language runtimes. The following sample code is written in Java and uses the AWS Java API.
The following lambda function reads an html file from the classpath and then prints it to the response object. Note that if you are building your Java project using Maven (which I highly recommend), this html file should be copied to src/main/resources folder.
package com.quickprogrammingtips.lambda;

import java.io.IOException;
import java.io.InputStream;
import java.io.OutputStream;


import com.amazonaws.services.lambda.runtime.Context;
import com.amazonaws.services.lambda.runtime.RequestStreamHandler;
import com.amazonaws.util.IOUtils;

// Render static HTML from AWS Lambda function
public class ShowHtmlLambdaHandler implements RequestStreamHandler {

	@Override
	public void handleRequest(InputStream is, OutputStream os, Context context) throws IOException {
        context.getLogger().log("Displaying html content" );
        try {
    		ClassLoader loader = ShowHtmlLambdaHandler.class.getClassLoader();
    		try(InputStream resourceStream = loader.getResourceAsStream("hello.html")) {
    			os.write(IOUtils.toByteArray(resourceStream));
    		}
        }catch(Exception ex) {
        	os.write("Error in generating output.".getBytes());
        }
	}
}
The following maven pom.xml contains the minimum dependencies for the above implementation. Use this pom file if you want to minimize the size of the fat jar uploaded to AWS lambda. Note the use of maven shade plugin to embed dependent jars in the final fat jar. if you don't use shade plugin, you will get ClassNotFoundException when you run the lambda function in AWS.
<project xmlns="http://maven.apache.org/POM/4.0.0" xmlns:xsi="http://www.w3.org/2001/XMLSchema-instance"
	xsi:schemaLocation="http://maven.apache.org/POM/4.0.0 http://maven.apache.org/xsd/maven-4.0.0.xsd">
	<modelVersion>4.0.0</modelVersion>
	<groupId>com.quickprogrammingtips.lambda</groupId>
	<artifactId>htmllambda</artifactId>
	<version>0.0.1-SNAPSHOT</version>

	<name>htmllambda</name>

	<properties>
		<project.build.sourceEncoding>UTF-8</project.build.sourceEncoding>
		<maven.compiler.source>1.8</maven.compiler.source>
		<maven.compiler.target>1.8</maven.compiler.target>
	</properties>

	<dependencies>
		<dependency>
			<groupId>com.amazonaws</groupId>
			<artifactId>aws-java-sdk-s3</artifactId>
			<version>1.11.98</version>
		</dependency>

		<dependency>
			<groupId>com.amazonaws</groupId>
			<artifactId>aws-lambda-java-core</artifactId>
			<version>1.1.0</version>
		</dependency>
		<dependency>
			<groupId>com.amazonaws</groupId>
			<artifactId>aws-lambda-java-events</artifactId>
			<version>1.3.0</version>
		</dependency>
	</dependencies>
	<build>
		<plugins>
			<plugin>
				<groupId>org.apache.maven.plugins</groupId>
				<artifactId>maven-shade-plugin</artifactId>
				<version>2.3</version>
				<configuration>
					<createDependencyReducedPom>false</createDependencyReducedPom>
				</configuration>
				<executions>
					<execution>
						<phase>package</phase>
						<goals>
							<goal>shade</goal>
						</goals>
					</execution>
				</executions>
			</plugin>
		</plugins>
	</build>
</project>
Following is the content of the hello.html file,
<html>
	<head>
		<title>Hello World!</title>
	</head>
	<body>
		<h1>Hello World!</h1>
	</body>
</html>
Build the project using the maven package command (ensure that you have maven installed and available on system path in your machine),
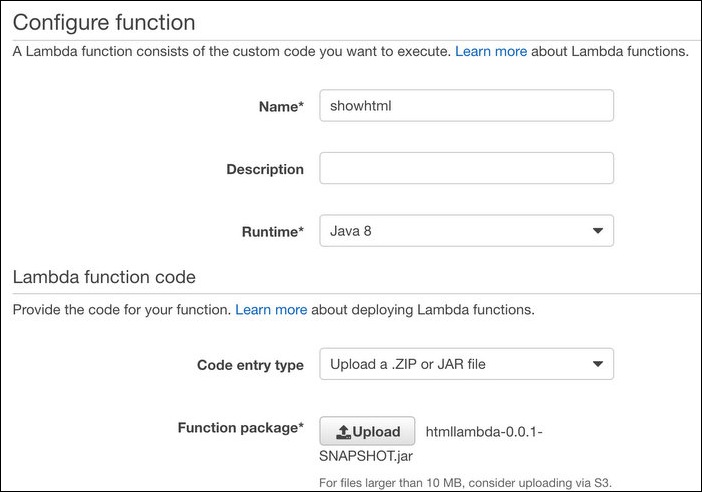
Upload the htmllambda-0.0.1-SNAPSHOT.jar created in target folder to AWS lambda as shown below. This assumes that a basic lambda role is already created using AWS IAM console. Ensure that this role (lambda_basic_execution) has at least the predefined policy AWSLambdaBasicExecutionRole attached to it. Once lambda function is created, click on the Test button to verify the html output.

We can now configure a simple API gateway endpoint to use the above lambda function to output static html.
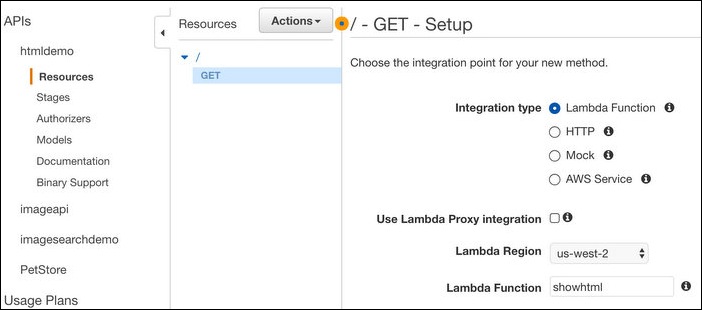
From API gateway, click on Create API. Name the new API as htmldemo. From Actions menu, click on Create Method and select GET. Select the region where lambda is hosted and select the lambda function as shown below. Click Save.
From Actions menu, click on Deploy API. Whenever any change is made to the API configuration, it needs to be deployed before it is available at the URL endpoint. This allows us to deploy different configurations to different stages (production, staging, qa etc.). When you deploying for the first time, you need to create a stage. Give it a name beta. This will enable the API on a public URL as shown below,

Click on the URL to open it in a browser window.
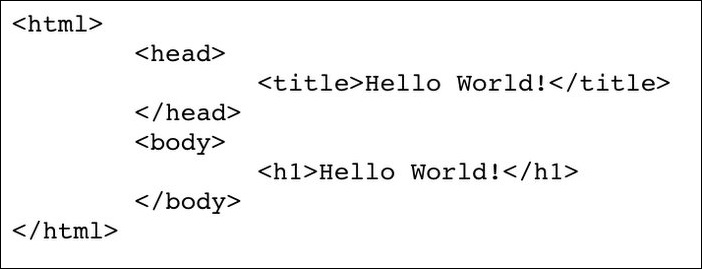
Browser renders our hello world html as raw text! This is due to the default JSON content type set by API gateway. Also note that our content has double quotes around it. Let us now modify API gateway configuration to remove double quotes and set our content type as html.
Click on GET under resources for htmldemo API. Click on Method Response on the right window. Remove application/json entry and then add Content-Type header as shown below.
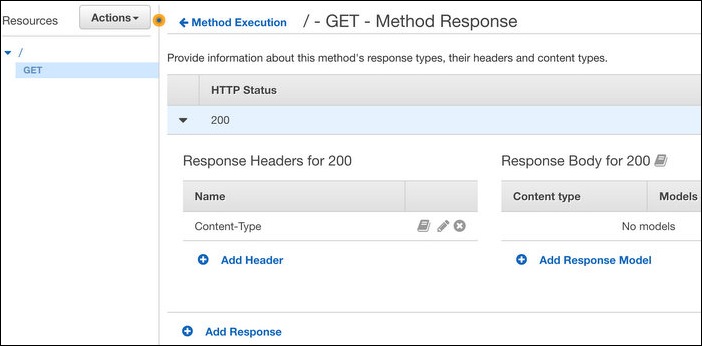
Click on GET under resources for htmldemo API. Click on Integration Response on the right window. Under Header Mappings, configure mapping value for Content Type as 'text/html'. Please note that single quotes must be preserved in the text. Under Body Mapping Templates, remove application/json and then add text/html with the following template content,
$input.path('$')
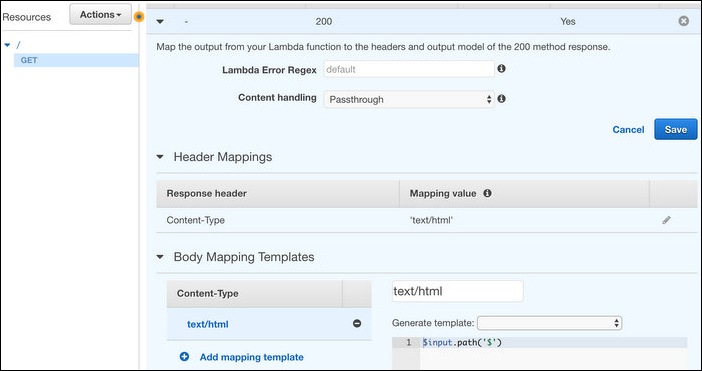
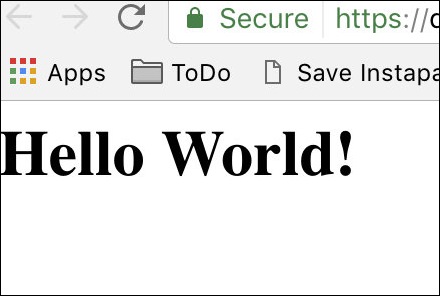
Now deploy the changed configuration. From Actions menu, click on Deploy API and deploy it to the beta stage we created earlier. Wait for a few seconds and then click on the API URL. If everything goes well, you should see the Hello World! output (beware of the browser cache!) in the browser.
